Start With the Movement of Material, Not the Machine
In a production room, the first question is not where the cutter will fit, it is how media moves from one stage to the next. Rolls, printed sheets, liners, finished decals and waste all need a clear path. If operators have to turn sideways to pass a board or step around stacked vinyl, the room is already costing time.
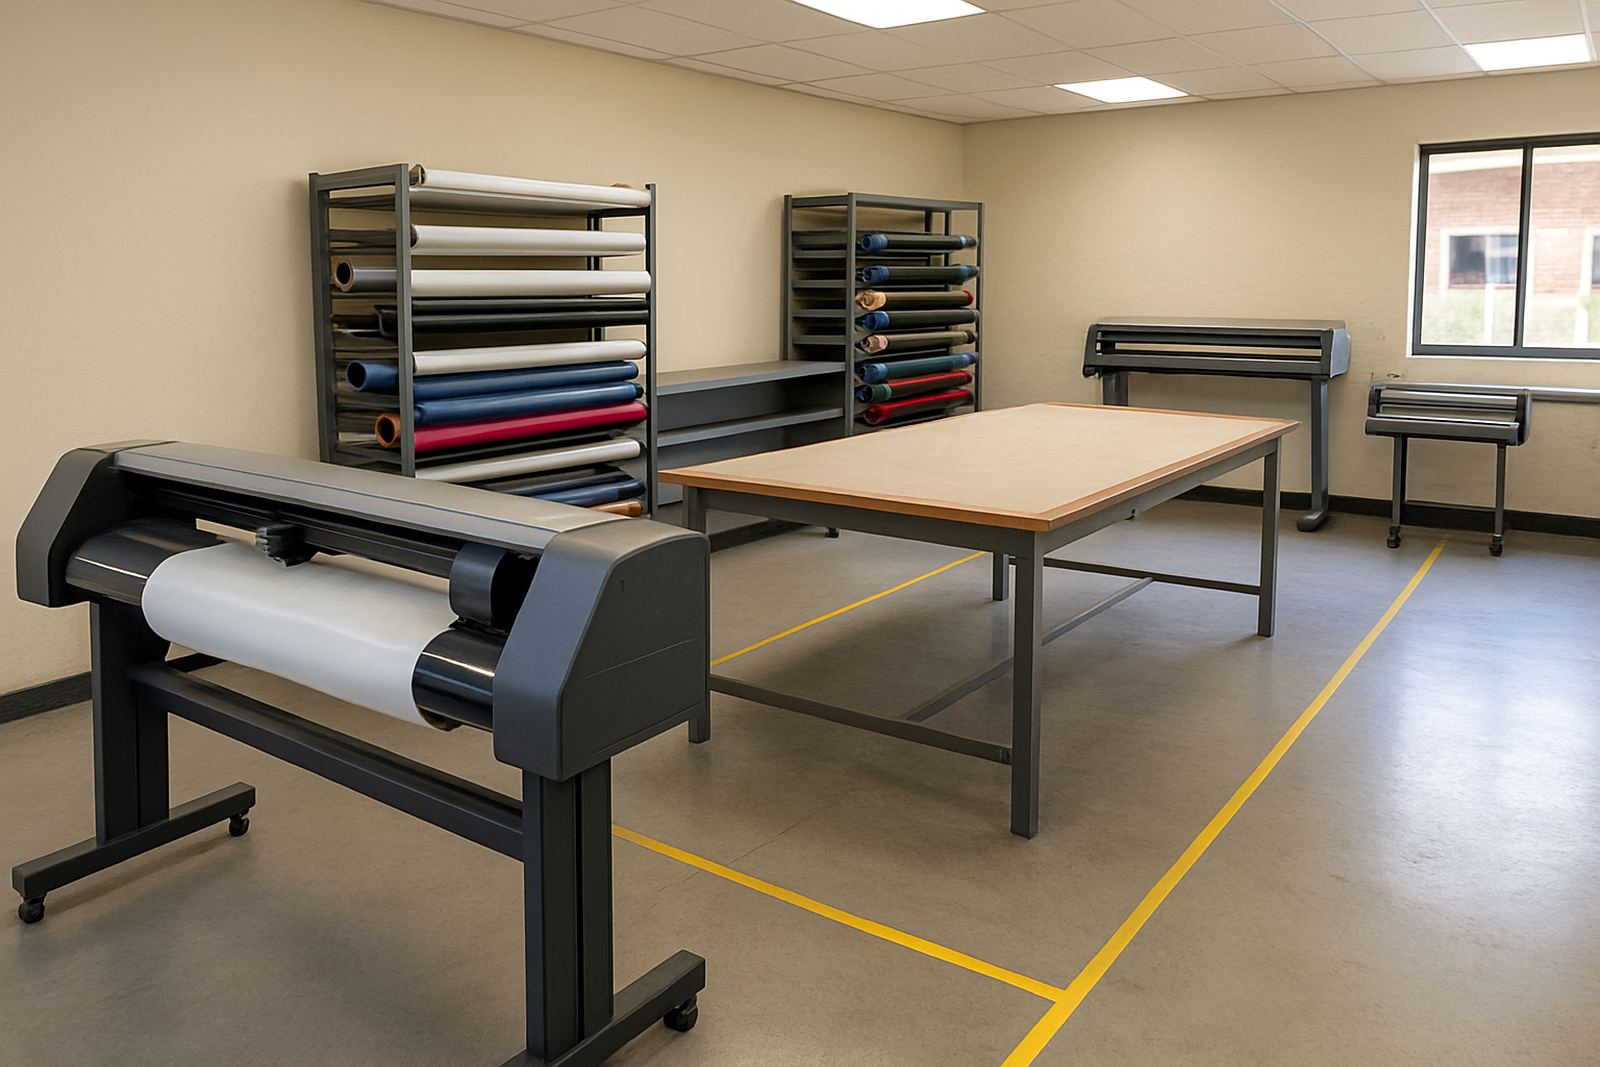
Plan the space around the full journey of the job. A roll comes in, gets checked, is loaded, printed or prepared for cutting, then moves to trimming, weeding, packing and dispatch. That path should be short, obvious and free of pinch points. In Isando and the wider East Rand, many workrooms sit inside older industrial units with mixed floor space, so it is worth marking zones on the floor before any equipment is bolted down.
A practical layout also helps when load-shedding hits. If the machine is close to the backup power point and the operator does not need to move across the room in the dark, there is less risk of damage. Keep a torch, spare blades and basic tools in the same place every time. It sounds simple, but consistency cuts mistakes.
Leave Space for Unwinding, Alignment and Safe Access
Media handling needs more room than many people allow. A narrow gap against a wall may look tidy, but it can lead to bent corners, damaged edges and poor registration. Leave enough clearance for opening lids, feeding material, and standing square to the cutter or print-and-cut unit. The operator should not need to twist the body to watch the pinch rollers or check blade pressure.
For larger shops, it helps to set a dedicated loading zone with a flat table at working height, a holder for roll stock and a clean surface for artwork checks. If you are running adhesive vinyl, reflective film or laminated graphics, the room should allow the sheet to lie flat without picking up dust. Coastal humidity is less of a concern in Johannesburg than in Durban, but even inland dust and temperature changes can affect static and edge curl.
- Keep rolls off the floor on racks or cradles.
- Store cut sheets flat, not leaning against a wall.
- Allow enough room for a full sheet to be rotated without touching other jobs.
- Place waste bins where trimmings can be removed quickly.
Build the Layout Around the Operator, Not Just the Kit
A room that looks efficient on paper can still slow production if tools are scattered. The best layout puts the operator's most used items within arm's reach. That includes blades, tape, squeegees, rulers, spare media cores and the laptop or controller used for cut settings. When these items are far apart, every job becomes a series of small walks and interruptions.
At a typical Isando production site, the cutting area should be close to the artwork prep point but far enough from packing to avoid crossed traffic. If two people are sharing the room, one can be loading media while the other removes finished work. That only works when each task has its own boundary. Good lighting matters too. Bad light makes registration marks harder to see and increases mistakes during fine detail work.
Safety is part of layout, not an add-on. Cables should not cross walkways, blades should be stored safely, and there must be enough room for the operator to step back when checking a cut. A cramped room may still produce jobs, but it usually produces more waste as well.
Use Zones to Separate Clean Work From Dirty Work
One of the easiest ways to improve workflow is to divide the room into zones. Clean work is artwork checking, media loading and cut setup. Dirty work is weeding, trimming, packing and scrap handling. If these tasks share the same table, dust and offcuts move back onto fresh material. That is where quality starts slipping.
A simple zone plan does not need major building work. It can be done with floor markings, shelving placement and a few rules. For example, keep laminated sheets away from open glue, keep packing cartons away from cutting paths, and keep sample boards separate from current production. If your shop takes on custom graphics for signage in Sandton or promotional work for clients in Midrand, a cleaner layout also makes customer viewing easier when they collect orders.
- Zone 1: receiving and inspection
- Zone 2: media loading and cut setup
- Zone 3: trimming and finishing
- Zone 4: packing and dispatch
Plan for Dust, Power and Maintenance Access
Production rooms are busy places, so maintenance has to be practical. If a cutter is pressed against a wall or hidden behind stacked stock, routine cleaning gets delayed. That creates avoidable downtime. Leave access space for vacuuming, blade changes, calibration checks and cable inspection. In businesses that handle a lot of vinyl, dust and small backing scraps build up fast, so access is not optional.
Power planning matters too. In South African industrial areas, outages and flickers are part of life. Keep the layout close to reliable sockets and label the circuits clearly. If the cutter, lighting and computer all share one overloaded point, a trip can stop a whole production run. A tidy room also helps technicians when they come out for installs nationwide or to guide an operator through blade pressure setup, registration calibration or troubleshooting. They can work faster when the room is organised.
Maintenance basics are easier to follow when the machine is not boxed in. A good layout lets staff clean rails, inspect rollers and check alignment without moving heavy stock around first. That saves wear on both the equipment and the team.
A Johannesburg Example: Small Room, Better Flow
A sign shop in the east of Johannesburg had one production room and too many jobs moving through it at once. Printed vinyl was being trimmed on the same table used for packing, and media rolls were stored against the wall behind the cutter. Operators kept reaching over active jobs and the waste pile grew near the entrance. The room was not large, but it was working against the team.
After the layout was changed, the shop placed incoming rolls on one side, the cutter in the middle and finishing on the opposite side. They added a narrow rack for offcut cores, shifted the packing bench away from the cutting path and put the most used tools in wall-mounted holders. No new floor space was added, yet the room felt bigger because movement was clearer. The team also cut down on handling damage and rework, which made deadlines easier to meet.
That is the real value of a good production room layout. It does not need fancy fittings. It needs a sensible flow, safe access and enough room for people to do careful work without getting in each other's way.
Set the Room Up for Training and Repeat Results
Layout also affects how quickly new operators learn. If every workstation is arranged differently, training takes longer and errors repeat. A standard room setup lets staff follow the same sequence every day, from media loading to final pack-out. That is especially useful when you run operator induction, supervisor coaching or a remote refresher session for branches and satellite sites.
When the room is consistent, managers can spot problems faster. If media is always loaded from the same side, if cut marks are always checked at the same table, and if finished work always moves to the same shelf, mistakes stand out. In turn, it becomes easier to train for artwork cut lines, blade pressure setup and production workflows without confusion. A smart layout is not only about speed. It is about reliable results, safer movement and less waste from day to day.